(Note: This site is was written with Zoom version 5.3.1, released 28 September, 2020 for both computer and mobile devices )
Introduction – Network – Mobile – Desktop/Laptop – Audio Settings – TEST!
Introduction
The Pandemic of 2020 (so far) has altered how we conduct ourselves over the entire planet. In order to keep our connections to one another, suddenly personal videoconferencing software has become critical.
And there are many options for this now. Apple’s FaceTime, Microsoft Teams, Google Meet and Jitsi Meet are just some of the choices out there.
However, Zoom Meetings has seemed to pull ahead for ease of use, cross platform compatibility (Windows, Mac, Linux, iOS, Android), and price (free, for most).
The Zoom meeting software is primarily designed for clear speech transmission, which means that by default it will automatically filter sound frequencies that are not in normal human pitch. There are a couple of good reasons for this- the biggest reason is that if you’re transmitting a smaller batch of frequencies, you’re using less bandwidth- and everything clicks along just a tiny bit faster.
That being said, Zoom has realized that one of the primary uses of their software is music; and have made it possible to improve the music experience a bit.
(Note: This series of articles is about configuring Zoom for music. It is not a general tutorial about microphone placement, or more complex setups that use multiple microphones or pickups. Just keep in mind that with a single microphone picking up both your voice and your instrument; it’s very easy to make either your voice or your instrument too loud. Experiment to get the best placement for you.)
Network
Having a solid connection to the network is critical to a good sounding video, that doesn’t freeze, or have other audio problems.
Cabled connection! If at all possible, you should use an Ethernet cable to connect to the network. If you must use WiFi, please ensure that others in your household are not on network devices during your performance.
Why is WiFi bad? WiFi is a party line- every device using it takes some of the bandwidth out of the available pool. So, if you’re on Zoom, your partner is browsing the web, you have a child playing online games, and another child warming up lunch in the microwave… this will reduce the amount of bandwidth available. Yes, home appliances and the walls of your home can interfere with the signal!
How fast is your network? It is important to check your Upload speed. The minimum Upload speed for a decent music performance is around 2.5Mbps (slower is possible, too; but you may have skips, jumps, and freezes in your feed). You can check your network speed at www.speedtest.net. (Note: Speedtest reports on your DOWNLOAD speed first. Unfortunately, this figure isn’t helpful in this context. Just wait a moment after the Download speed is reported, and you’ll have your figure for your Upload speed.)
Mobile
Unfortunately, the options to improve the sound of a performance are very limited on a mobile device. Most of the options discussed in these articles are only possible on a full-sized PC or laptop.
That being said, there is one very important setting you can configure on mobile. To configure it; first open the Zoom Cloud Meetings app, create an account, and log in.
Now, find the little gear icon. Tap on it, and it will open the configuration panel.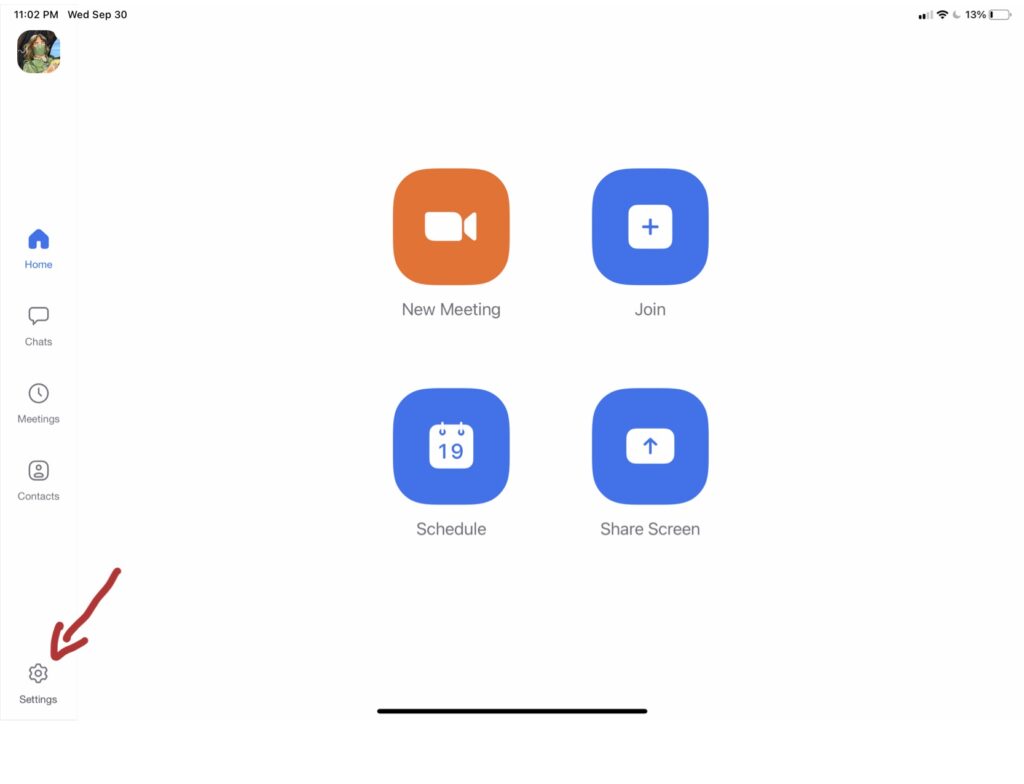
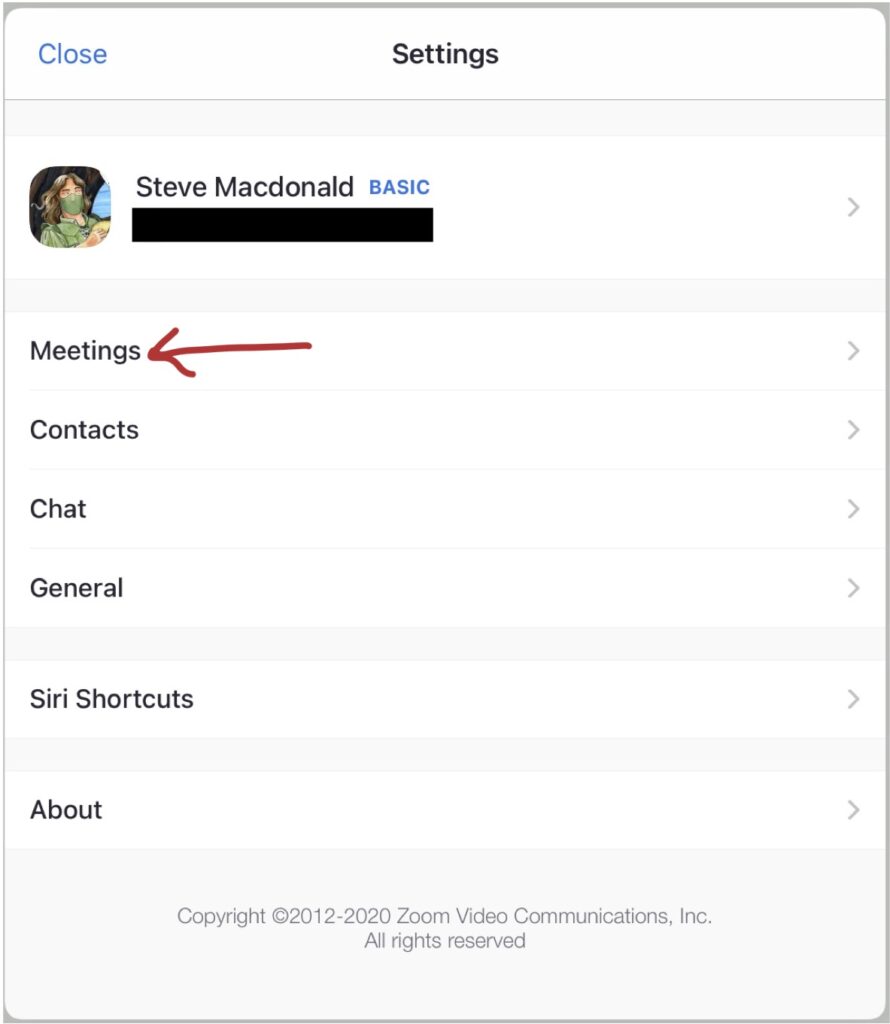
Now that you’re in the settings, select Meetings.
Scroll down until you get to Original Sound, and turn it on.
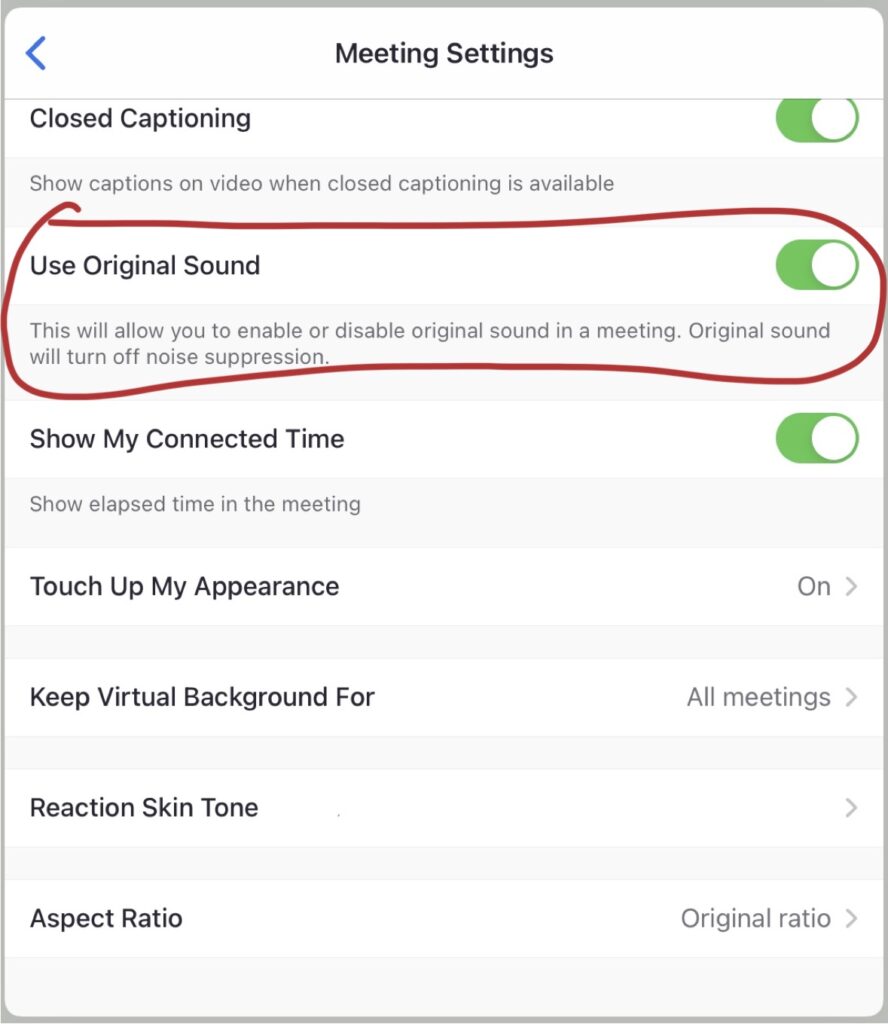
That’s it!
It’s counter-intuitive; but when Original Sound is ON, this means that Noise Suppression (bad for musicians) is OFF.
So, always make sure that Original Sound is ON.
Jump to the Test! section.
Desktop / Laptop Computers
As stated above the Mobile section, at this time it is better to use a full-sized computer (desktop or laptop) than an iOS or Android mobile device, due to the more detailed configurations that are available. Let’s get started!
Download and install the App
While you can participate in a Zoom meeting through your web browser, you cannot optimize the sound. You need to download the app to access the advanced settings to properly configure audio for performance. You will also need a free account if you wish to test your settings.
You can create your free account at zoom.us/signup. You have the choice of using your Google or Facebook accounts; or you can create your own individual login.
Once you’ve created your account, you can download the Zoom application from zoom.us/download.
Audio Settings
Note: This section is only relevant for Desktop/Laptop users. If you’re on a Mobile device, please see the Mobile section.
Madison Metricula Roberts did an excellent YouTube video that covers most of the following steps. There are one or two additional tweaks below that she doesn’t touch on, but they are minor. You can see her video by following this link to YouTube.
Now that you’ve made your account and downloaded the application, let’s start it up and configure!
Find the Settings
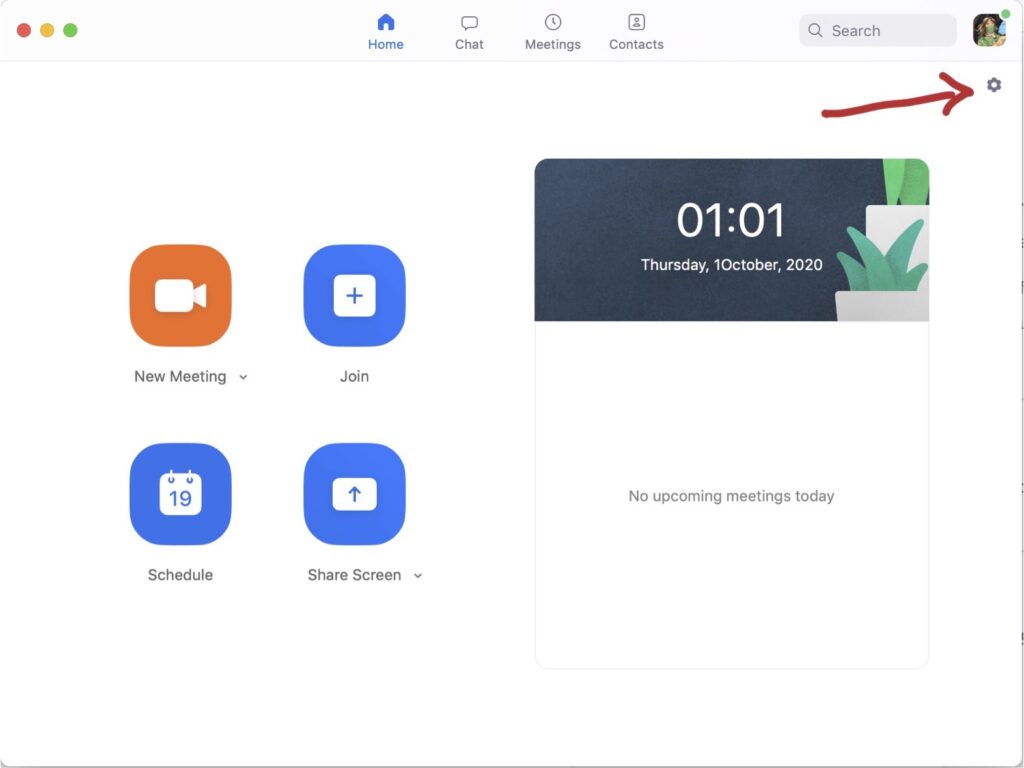
Open the Zoom app and click the ‘Settings’ cog wheel icon in the upper right corner. That will open the settings panel. ‘Audio’ is the third option down in the list on the lefthand side.
Adjust the Output/Input Volume

Output Volume: In the Audio section, the top slider bar adjusts your headphone/speaker volume for your sound (what you hear). Headphones or earbuds are preferred for your best listening. More importantly, if you are listening through speakers, the microphone might ‘hear’ them too. This can create a feedback echo. (If headphones are not an option, turning this slider down can help reduce the echo. Also- don’t place the microphone near the speakers!)
Note: If there is more than one person in a room accessing the Zoom meeting independently on their own devices, it’s very important to use headphones!!! It is advised to keep one ear free of the headphones, if possible, to minimize a local ‘echo’ effect you get when the other person is talking.
Input Volume: The bottom slider bar adjusts your input sensitivity. The built-in microphone of your computer will work; but a USB mic or other ‘line in’ device (such as headphones with a microphone attached) will improve your sound greatly.
Note: Again, if there is more than one person in a room accessing Zoom independently, you will want to discuss keeping all your microphones muted most of the time. There will always be a slight delay between when someone talks and when the sound comes out of your headphones.
Microphone Volume and Background Noise
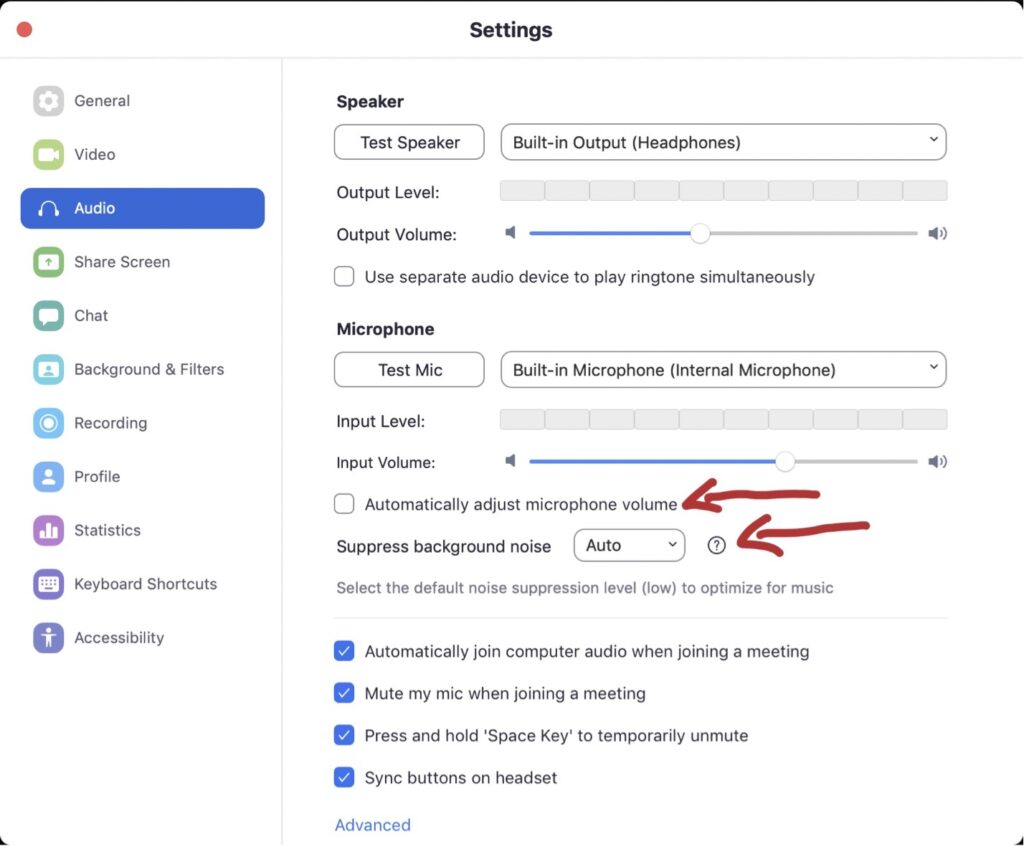
Make sure that ‘Automatically adjust microphone volume’ is UNCHECKED. This keeps the software from lowering the input when you play louder, and raising it when you play softer.
Right below that is the ‘Suppress background noise’ button. Leave it set to ‘Auto’; as this will actually get adjusted in the Advanced Option.
Click the ‘Advanced’ push button at the bottom
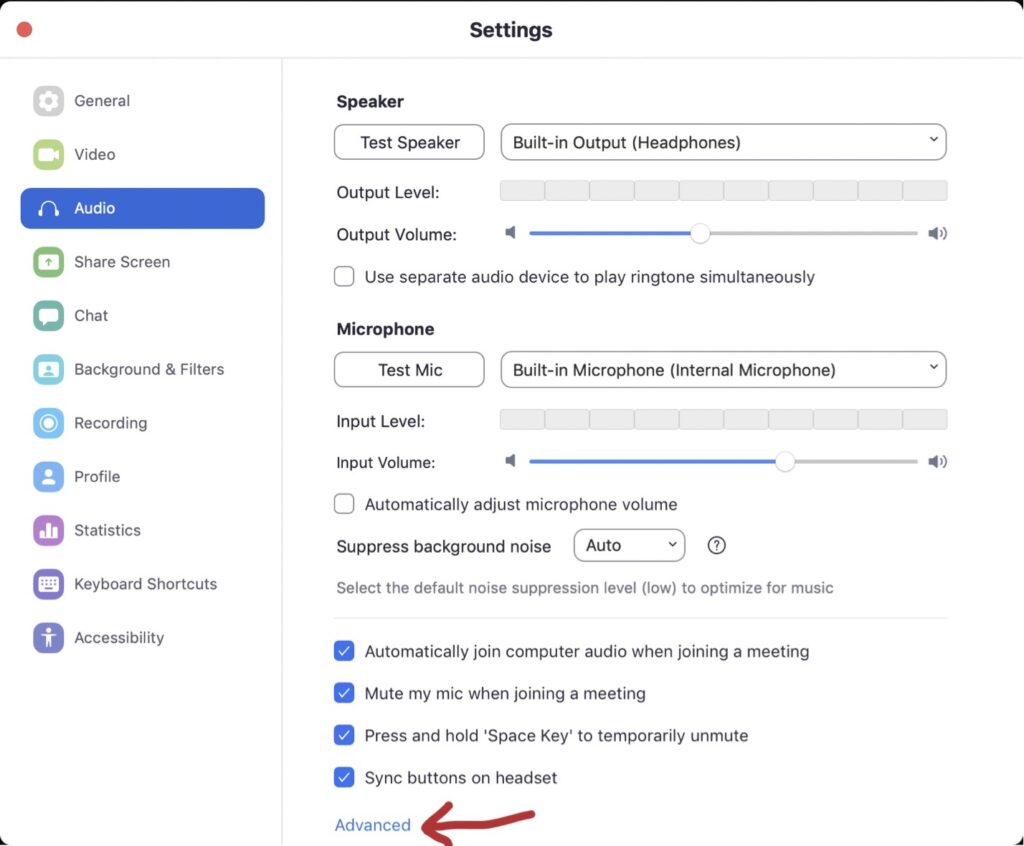
This opens the advanced settings panel.
Advanced Settings
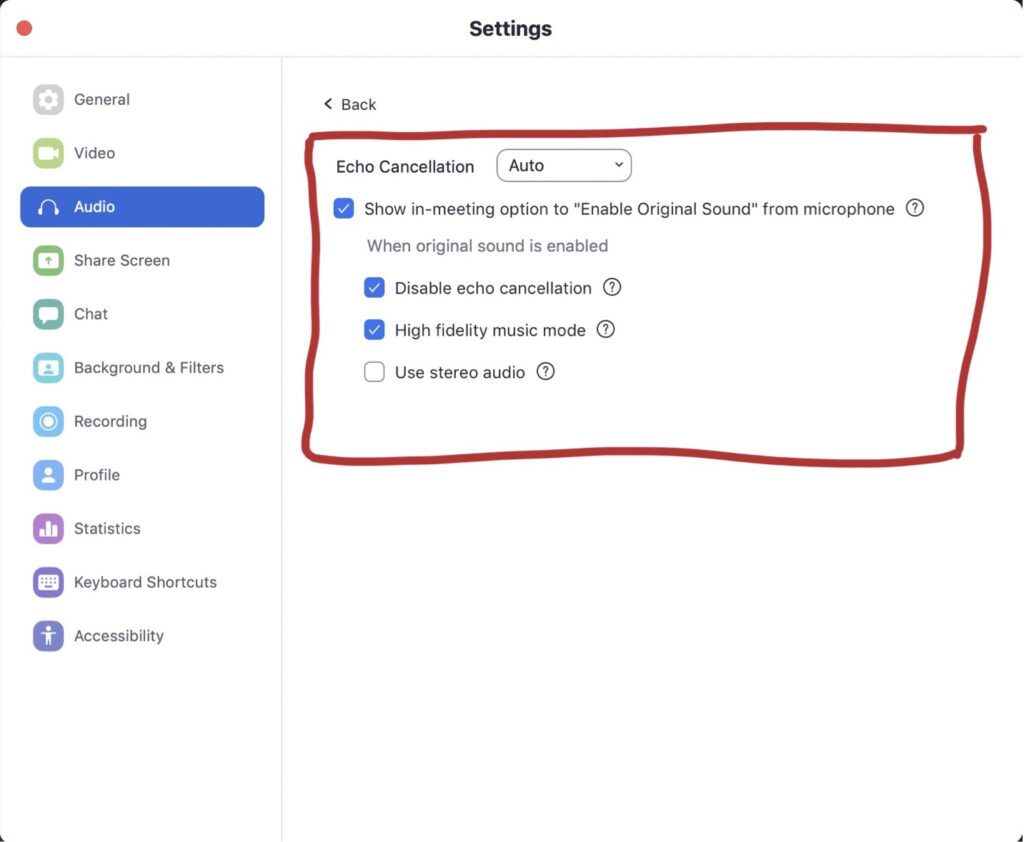
First off all, ensure that Echo Cancellation is set to Auto. This way it responds to the echo cancellation checkbox below.
Second, select the checkbox for ‘Show in-meeting option to “Enable Original Sound” from microphone’. You then have three options available:
‘Disable echo cancellation’ should be selected
‘High fidelity music mode’ should be selected
‘Use stereo audio’ is optional. Checking this option uses more of your system’s resources to split your signal into a stereo field. I generally leave it unchecked.
You may now close the settings panel, you are done in here!
TEST!
We’ve configured as best we can, so now its time to see how it all works!
 Open the Zoom app to the ‘Home Screen’
If you aren’t already there, click on the ‘Home’ icon at the top of the screen. (The other icons are ‘Chat’, ‘Meetings’, and ‘Contacts’). If you haven’t made a free Zoom account yet, now is the time to do it. You cannot access the Home screen without one.
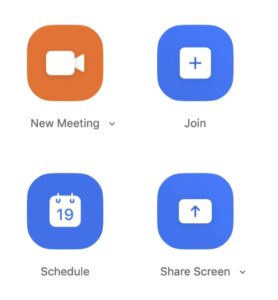
Click the ‘New Meeting’ button
It’s a big, friendly orange. 🙂 This will start a new meeting with only you as a participant.
Toggle the ‘Original Sound’ option in the upper left
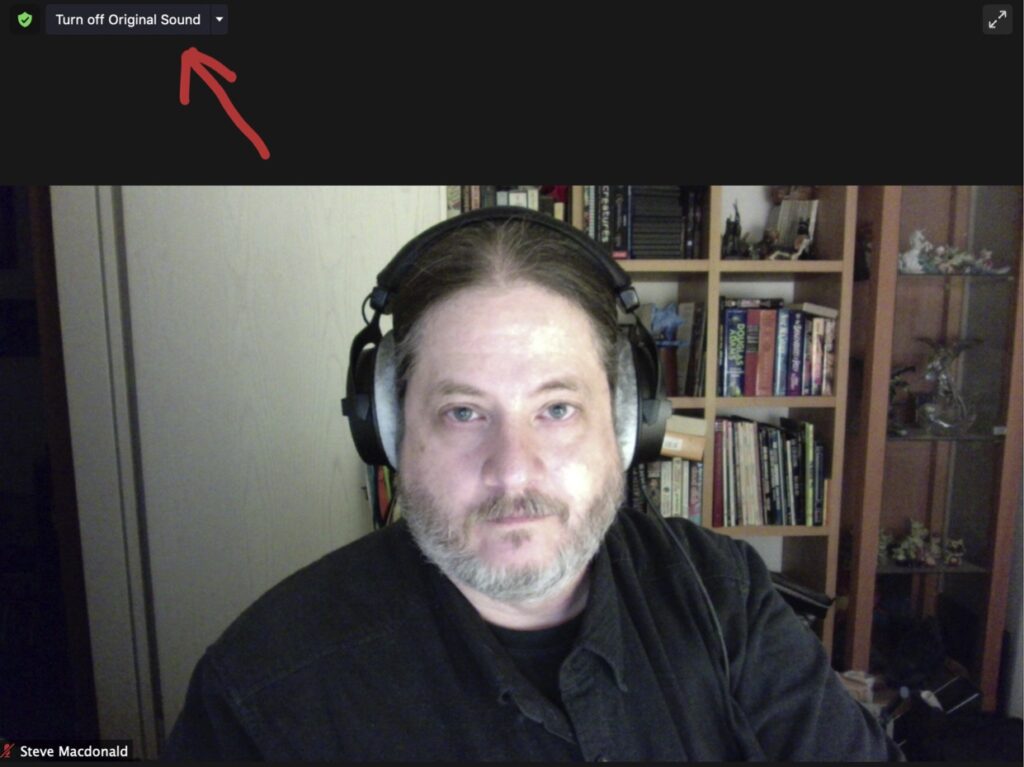
Set it to read ‘Turn OFF Original Sound’. This means that ‘Original Sound’ is on; which means that echo cancellation off (which is what we want).
Hidden ‘Task Bar’
At the bottom of the screen is a hidden task bar. It appears when you roll your mouse to the bottom of the screen.
Microphone and Video controls
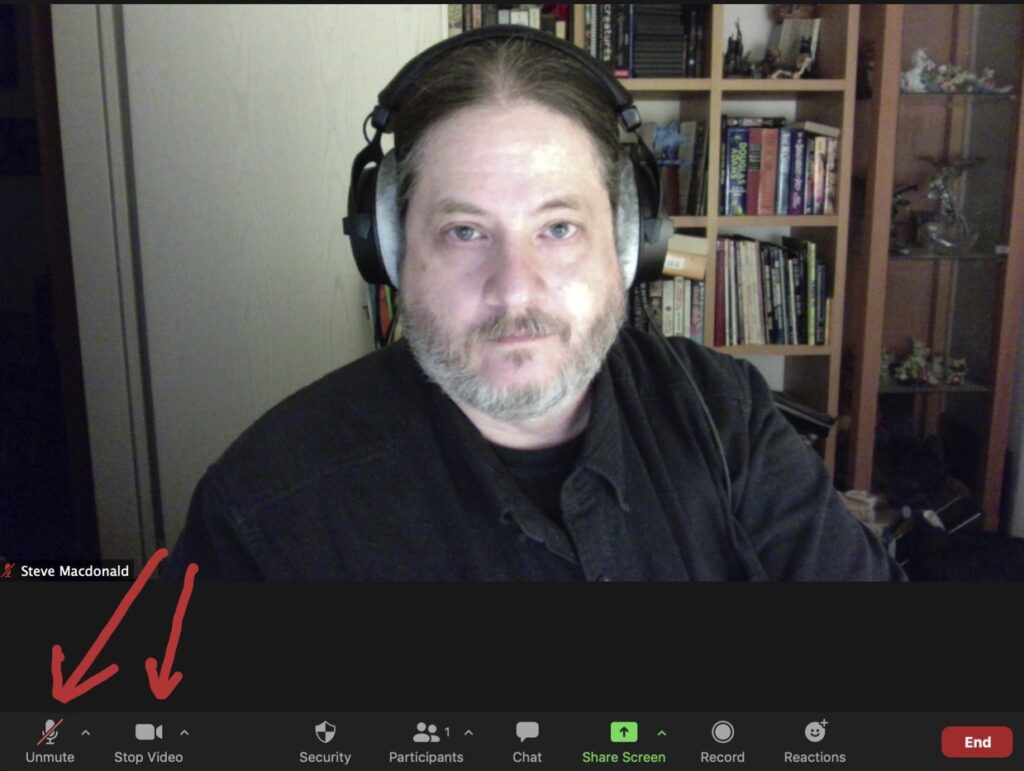
In the lower left corner of the screen on the Task Bar are the icons that turn your Microphone and Video on and off. There is a small carat next to each with a short menu of options (like setting your background image, etc). These sub-menus also act as a shortcut to options in the Settings menu.
Raising your hand and chatting
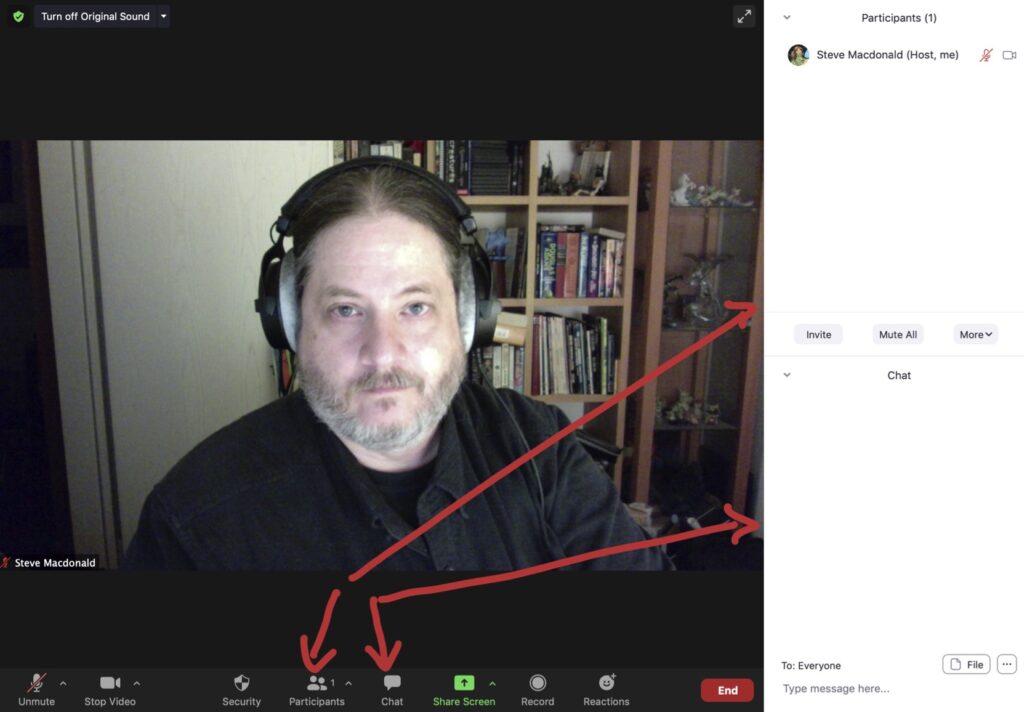
When you click the ‘Participants’ icon in the task bar, a new pane opens on the right, listing everyone in the meeting. If you are not the host, the icon that allows you to raise your hand will appear next to the ‘Invite’ button (Note- when you are testing for yourself, you are the Host; and therefore cannot raise your hand).
You will always appear at the *top* of the Participants list, and the hosts of the room should appear immediately below you in the list. When several people have raised their hands, they will appear in the order that they tapped the ‘Raise Hand’ icon.
This means that when you tap your ‘Raise Hand’ icon, to everyone else you will appear at the bottom of that list, but your view keeps you at the top. So, when you want to jump in, take a quick look at the bottom ‘Raised Hand’, and you will know how many there are in line in front of you.
Chat
Clicking on the ‘Chat’ icon in the Task Bar will open a new pane on the right for text chat. Be sure to always check the ‘To:’ pull down menu to ensure that you’re talking to Everyone, or directly to the people you wish to speak to.
Zoom Chat is not automatically saved, and it is possible that your Moderator has the security settings set so that you cannot copy/paste the chat elsewhere. It’s also not very secure; so you may wish to consider using different chat client, like Discord.
Testing your sound
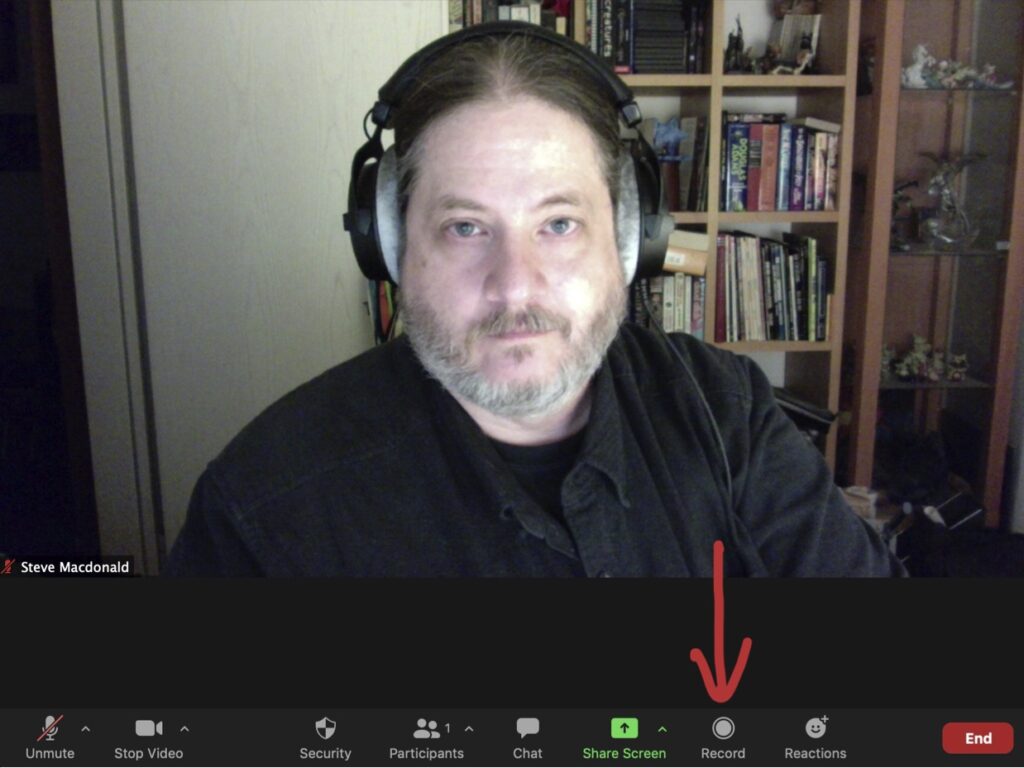
On the Task Bar is a ‘Record’ button. Clicking this will start a local video recording. Go ahead and play a song, read a poem, do an interpretive dance… and then end the meeting. Zoom will then convert the data into an mp4 file which you can then review to check your local sound quality, balance, etc.
Note: This is a local recording- so any issues with your network will not show up in this test. You need to create a meeting with a friend if you wish to test your network speed!
Done!
Close your temporary meeting, and that is all there is to it! You have now optimized all the settings of your Zoom app for music performance, and you know how to raise your hand and chat!
When you join a performance meeting, just double check your settings and ENJOY.
If you would like more help in working with Zoom, there are a bunch of video tutorials from Zoom here: https://support.zoom.us/hc/en-us/articles/206618765-Zoom-video-tutorials
Happy Zooming!